The inevitable junk drawer. Seems like we all have one (or maybe a few…ahem), and sometimes the clutter spills over into other drawers. Take my silverware drawer, for example. It starts off innocently enough with twist ties for garbage bags and a box of toothpicks. Okay, sure, lets save those unopened chop sticks from China Garden. And there’s that hotel decaf coffee packet you brought home because you’re a hoarder and maybe you’ll have a guest who drinks decaf coffee because you don’t, and how nice of you to have a random packet of sub-par, unidentified coffee waiting for them that’s only been there five years. Next thing you know, you’ve got random screws and neon plastic spider rings from Halloweens past.

(I had already started cleaning the drawer out when I remembered to get a “before” picture, but I promise, there were neon plastic spiders in there. I also spy a “moist towelette” from Joe’s Crab Shack.)
It’s shameful, I know. But the first step is admitting you have a problem. Step 2 is solving the problem by creating a DIY drawer organizer! The plastic dollar store thing wasn’t cutting it folks. It didn’t have enough spaces for our assorted cutlery, and some spaces were too short to be useful. So let’s get started!

Materials List:
-Several pieces of 1/4x2x2 poplar wood (any type of wood this size would be fine. These pieces were around $1 each at Lowes when I did this)
–Miter Box with Saw (unless you have a chop saw…lucky you!)
–Sanding Sponge or sand paper
-Measuring tape
-Optional: wood stain or paint
Step 1: Clear drawer & measure
For this project, I headed to a local home improvement store and picked up some pieces (I bought 4, which was enough to do one large drawer with enough left over to do another small drawer). Start by cleaning out the drawer and organizing the utensils that will be coming back in. I laid them out in the drawer the way I wanted. Write down the measurements for the pieces you need to cut.

(TIP: For some drawers, you may get more bang for your buck by doing diagonal slats. Smaller items go in the spaces closest to the corner of the drawer, and long items have plenty of room across the center.)
Step 2: Cut
Use a miter box to cut the pieces and smooth the cut edges with a sanding block.

Step 3: Glue
Do a dry fit to make sure all the pieces were cut right before applying wood glue to attach the pieces together. Once glued, let the organizer dry for an hour before inserting it into the drawer. And that’s it! It really is that simple. If you prefer, you can definitely stain or paint the organizer to match your drawer. Just be sure to seal it and allow it to fully cure since it’s storing things we eat with 😉


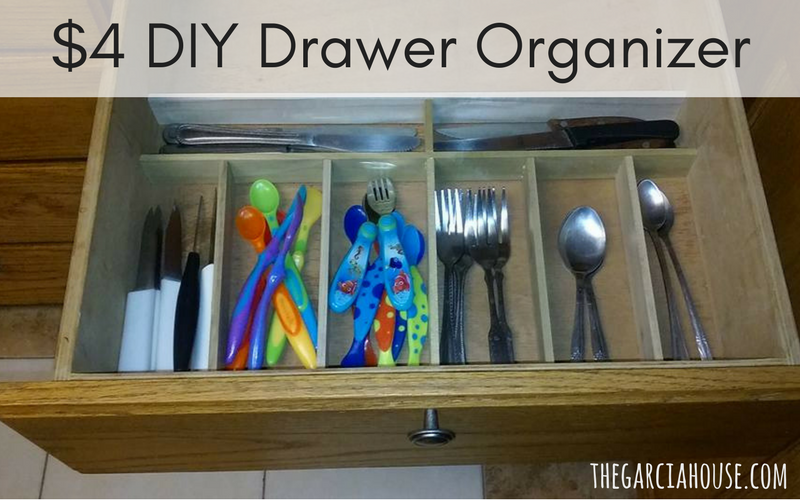
(So much extra space! And now I don’t have a dangerous mountain of knives. A space for butter knives, a space for steak knives, and one for paring knives.)
I’m really happy with how this turned out. It was simple and cheap, plus it looks and functions so much better. Now I want to start on my knife and baking drawers! If any of you guys end up doing this DIY, I’d love to see pictures of how yours turned out! Just click on “Contact Me” and send me an email! 🙂