Happy New Year everyone!!! Oh, wait, it’s already February? Well that’s embarrassing…*ahem*
In any case, this is my first post of the year and I’m excited about all the things in store for 2017 (at least blog-wise anyways). So here’s what’s been going on in the Garcia house as of late:
1. Roman just turned two!!


He is obsessed with Paw Patrol so there was an explosion of pup decor–including his first piñata–and he had a blast! This is it. I officially have a toddler folks. But I’m probably gonna be in denial forever and just call him my baby. Who started cutting onions in here?!? Rude.
2. I turned 27!
 Not nearly as exciting as turning two. I’m trying to figure out what to do with the last three years of my twenties. Gotta make sure I don’t look back when I’m older and say, “why did I allow my youth to languish away while I watched Sex in the City reruns and RHoA? I could’ve climbed Mount Kilimanjaro or something.” I’ll be taking suggestions for my “20s Bucket List” in the comments 😉
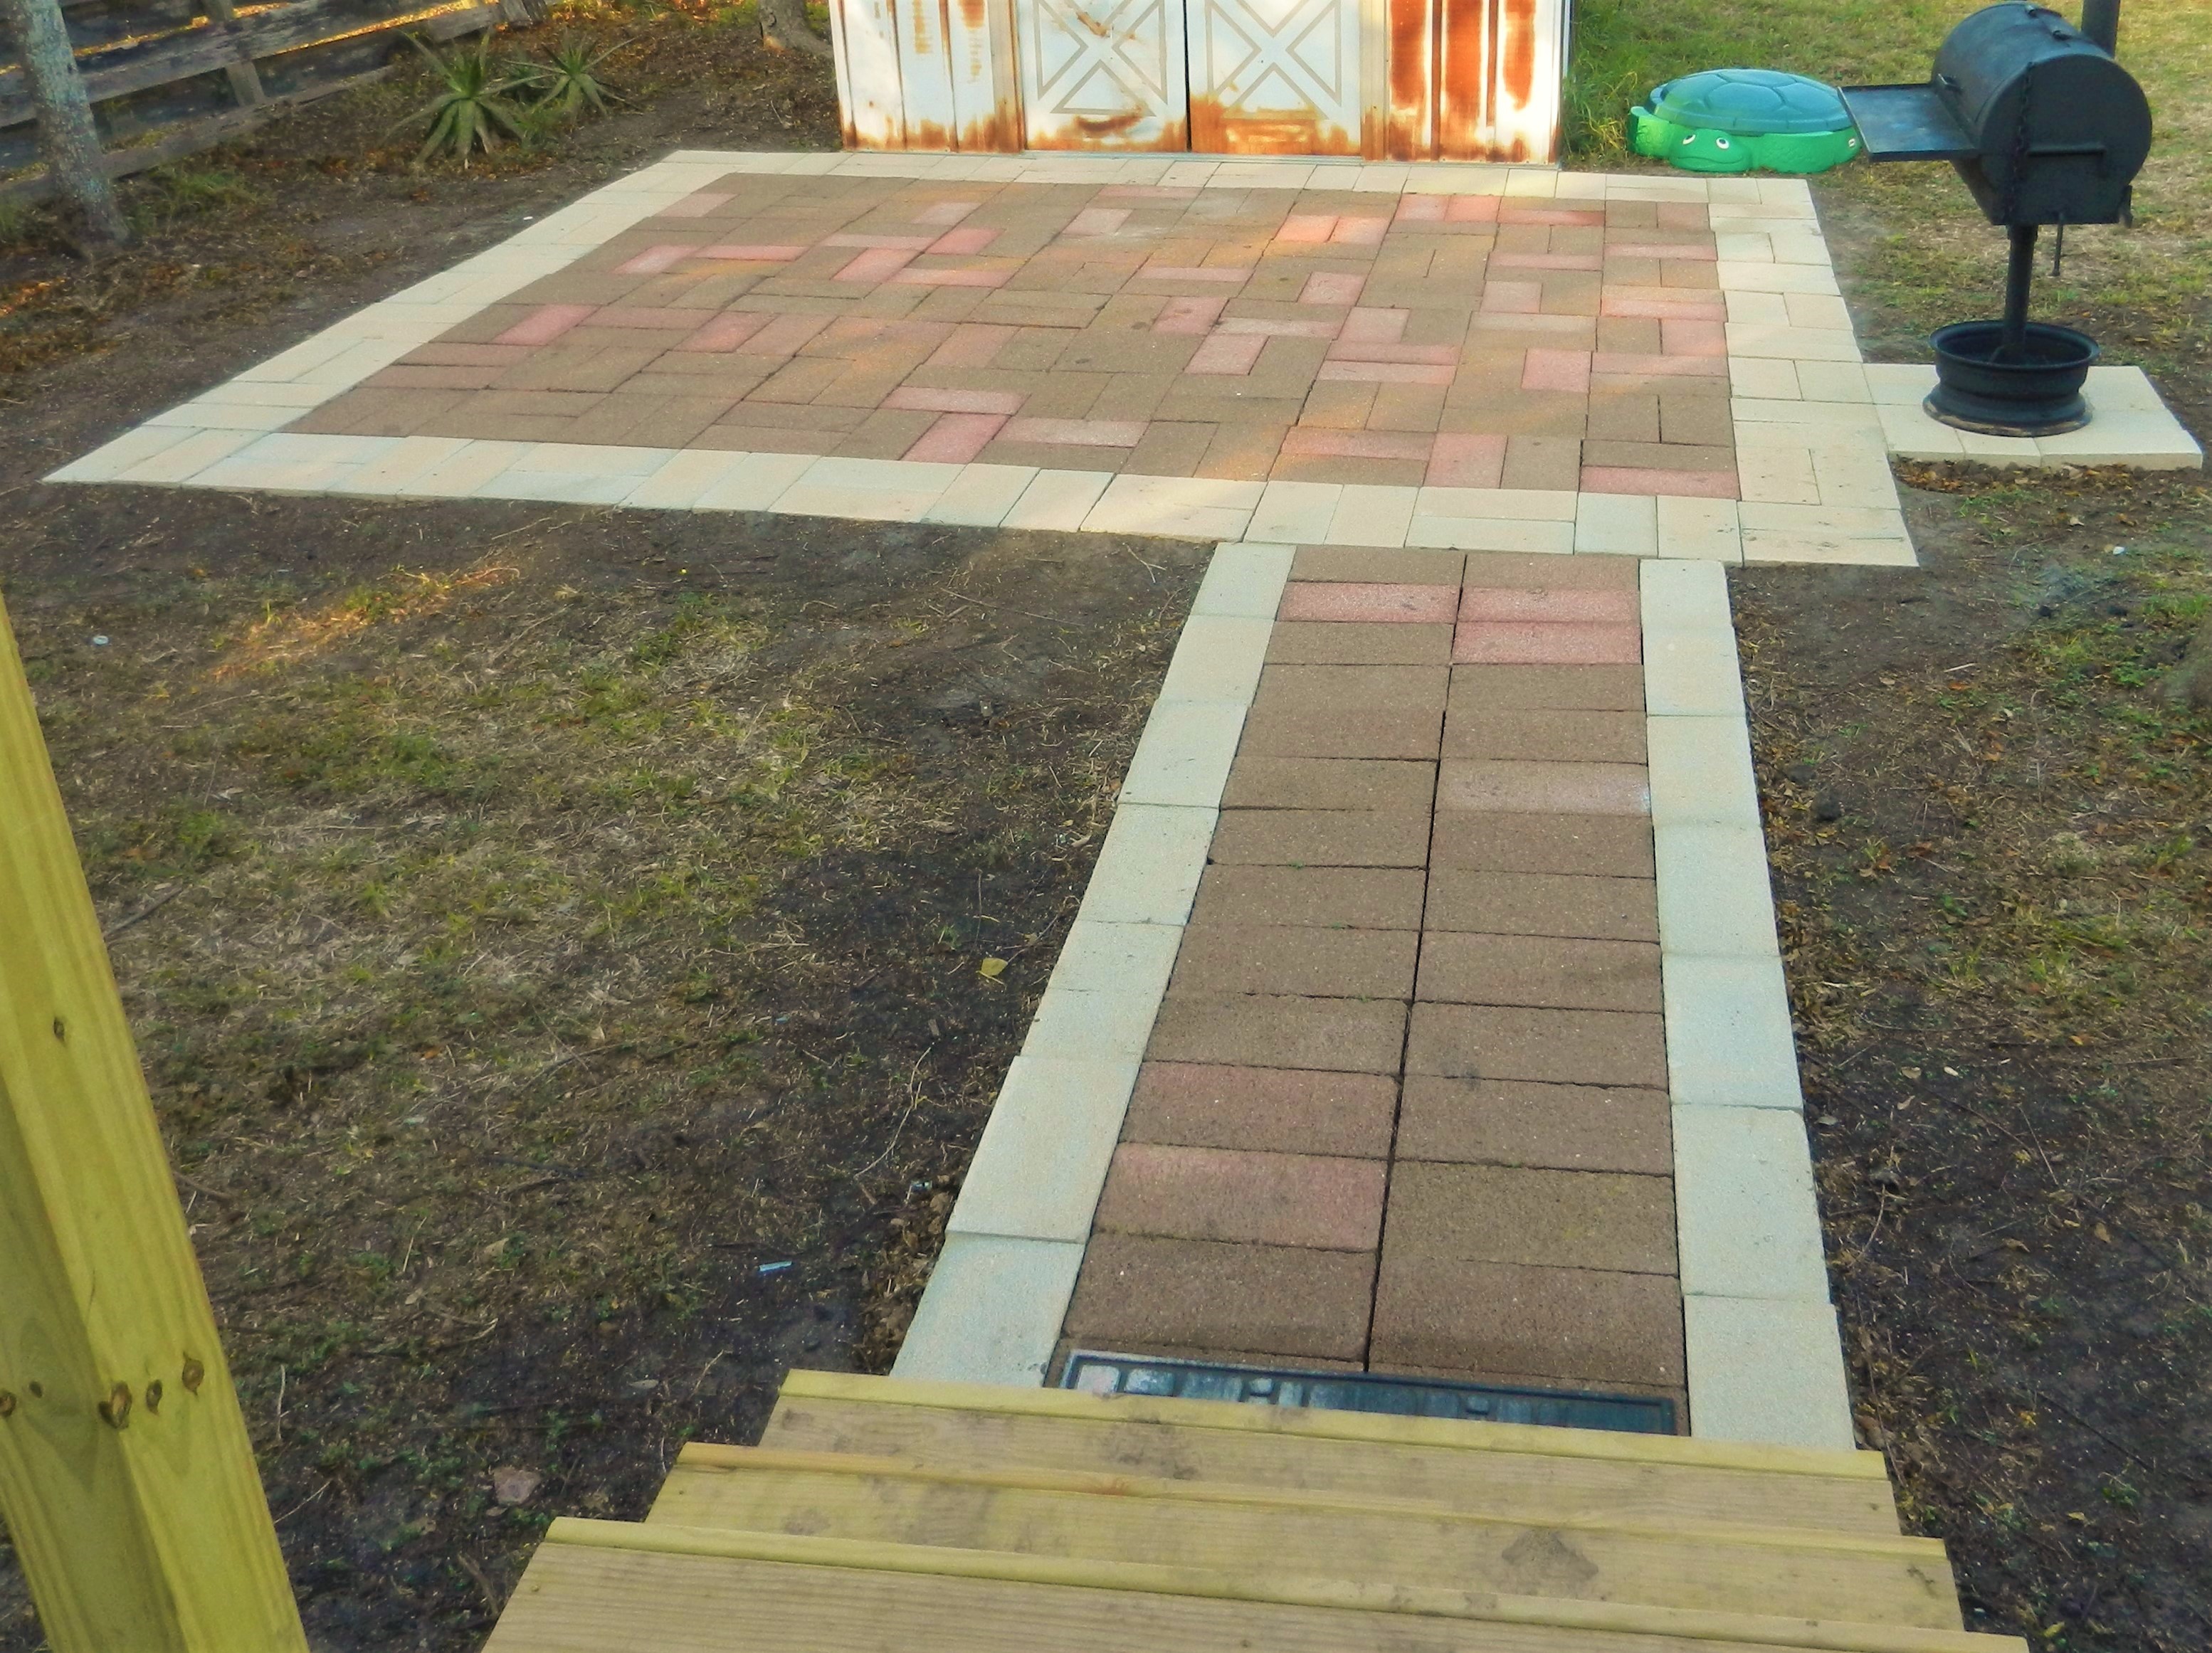
3. We’ve done a bunch to our backyard!
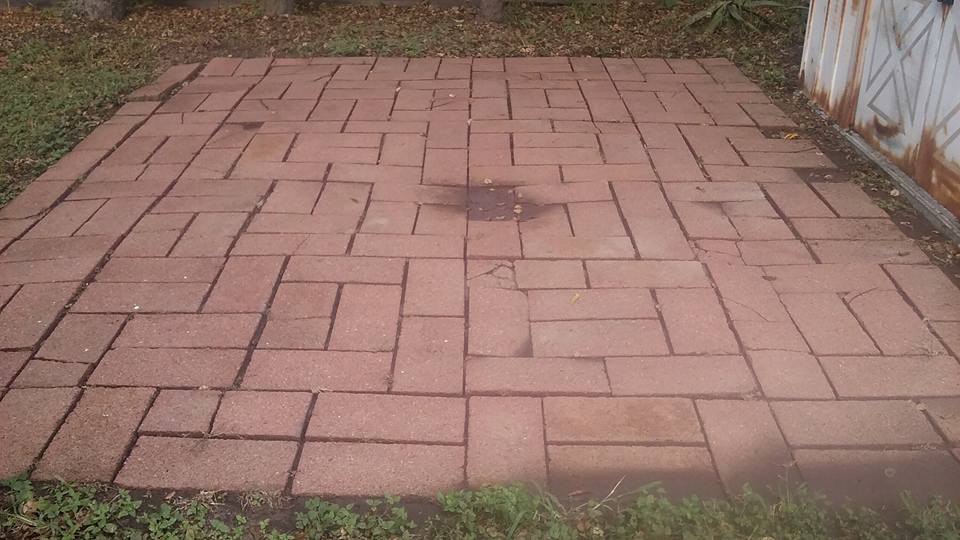
As I mentioned in my previous post, we were redoing our patio. My friends, it is finally complete! Without further adieu, some Before and After shots:
 It is SO much nicer! We actually use it now. It’s level, larger, cleaner. I love it. Plus having a consistent basket weave pattern makes it so much more attractive. The gray border was actually a last minute solution when we discovered they no longer make our red paver–only a gray one. It turned out that we had *exactly* enough red for the center and walkway with the gray used as a border. I actually think it looks nicer than if it had been all red.
We also added on space for the grill to sit.
Here’s another “Before” view:
 And “After”:
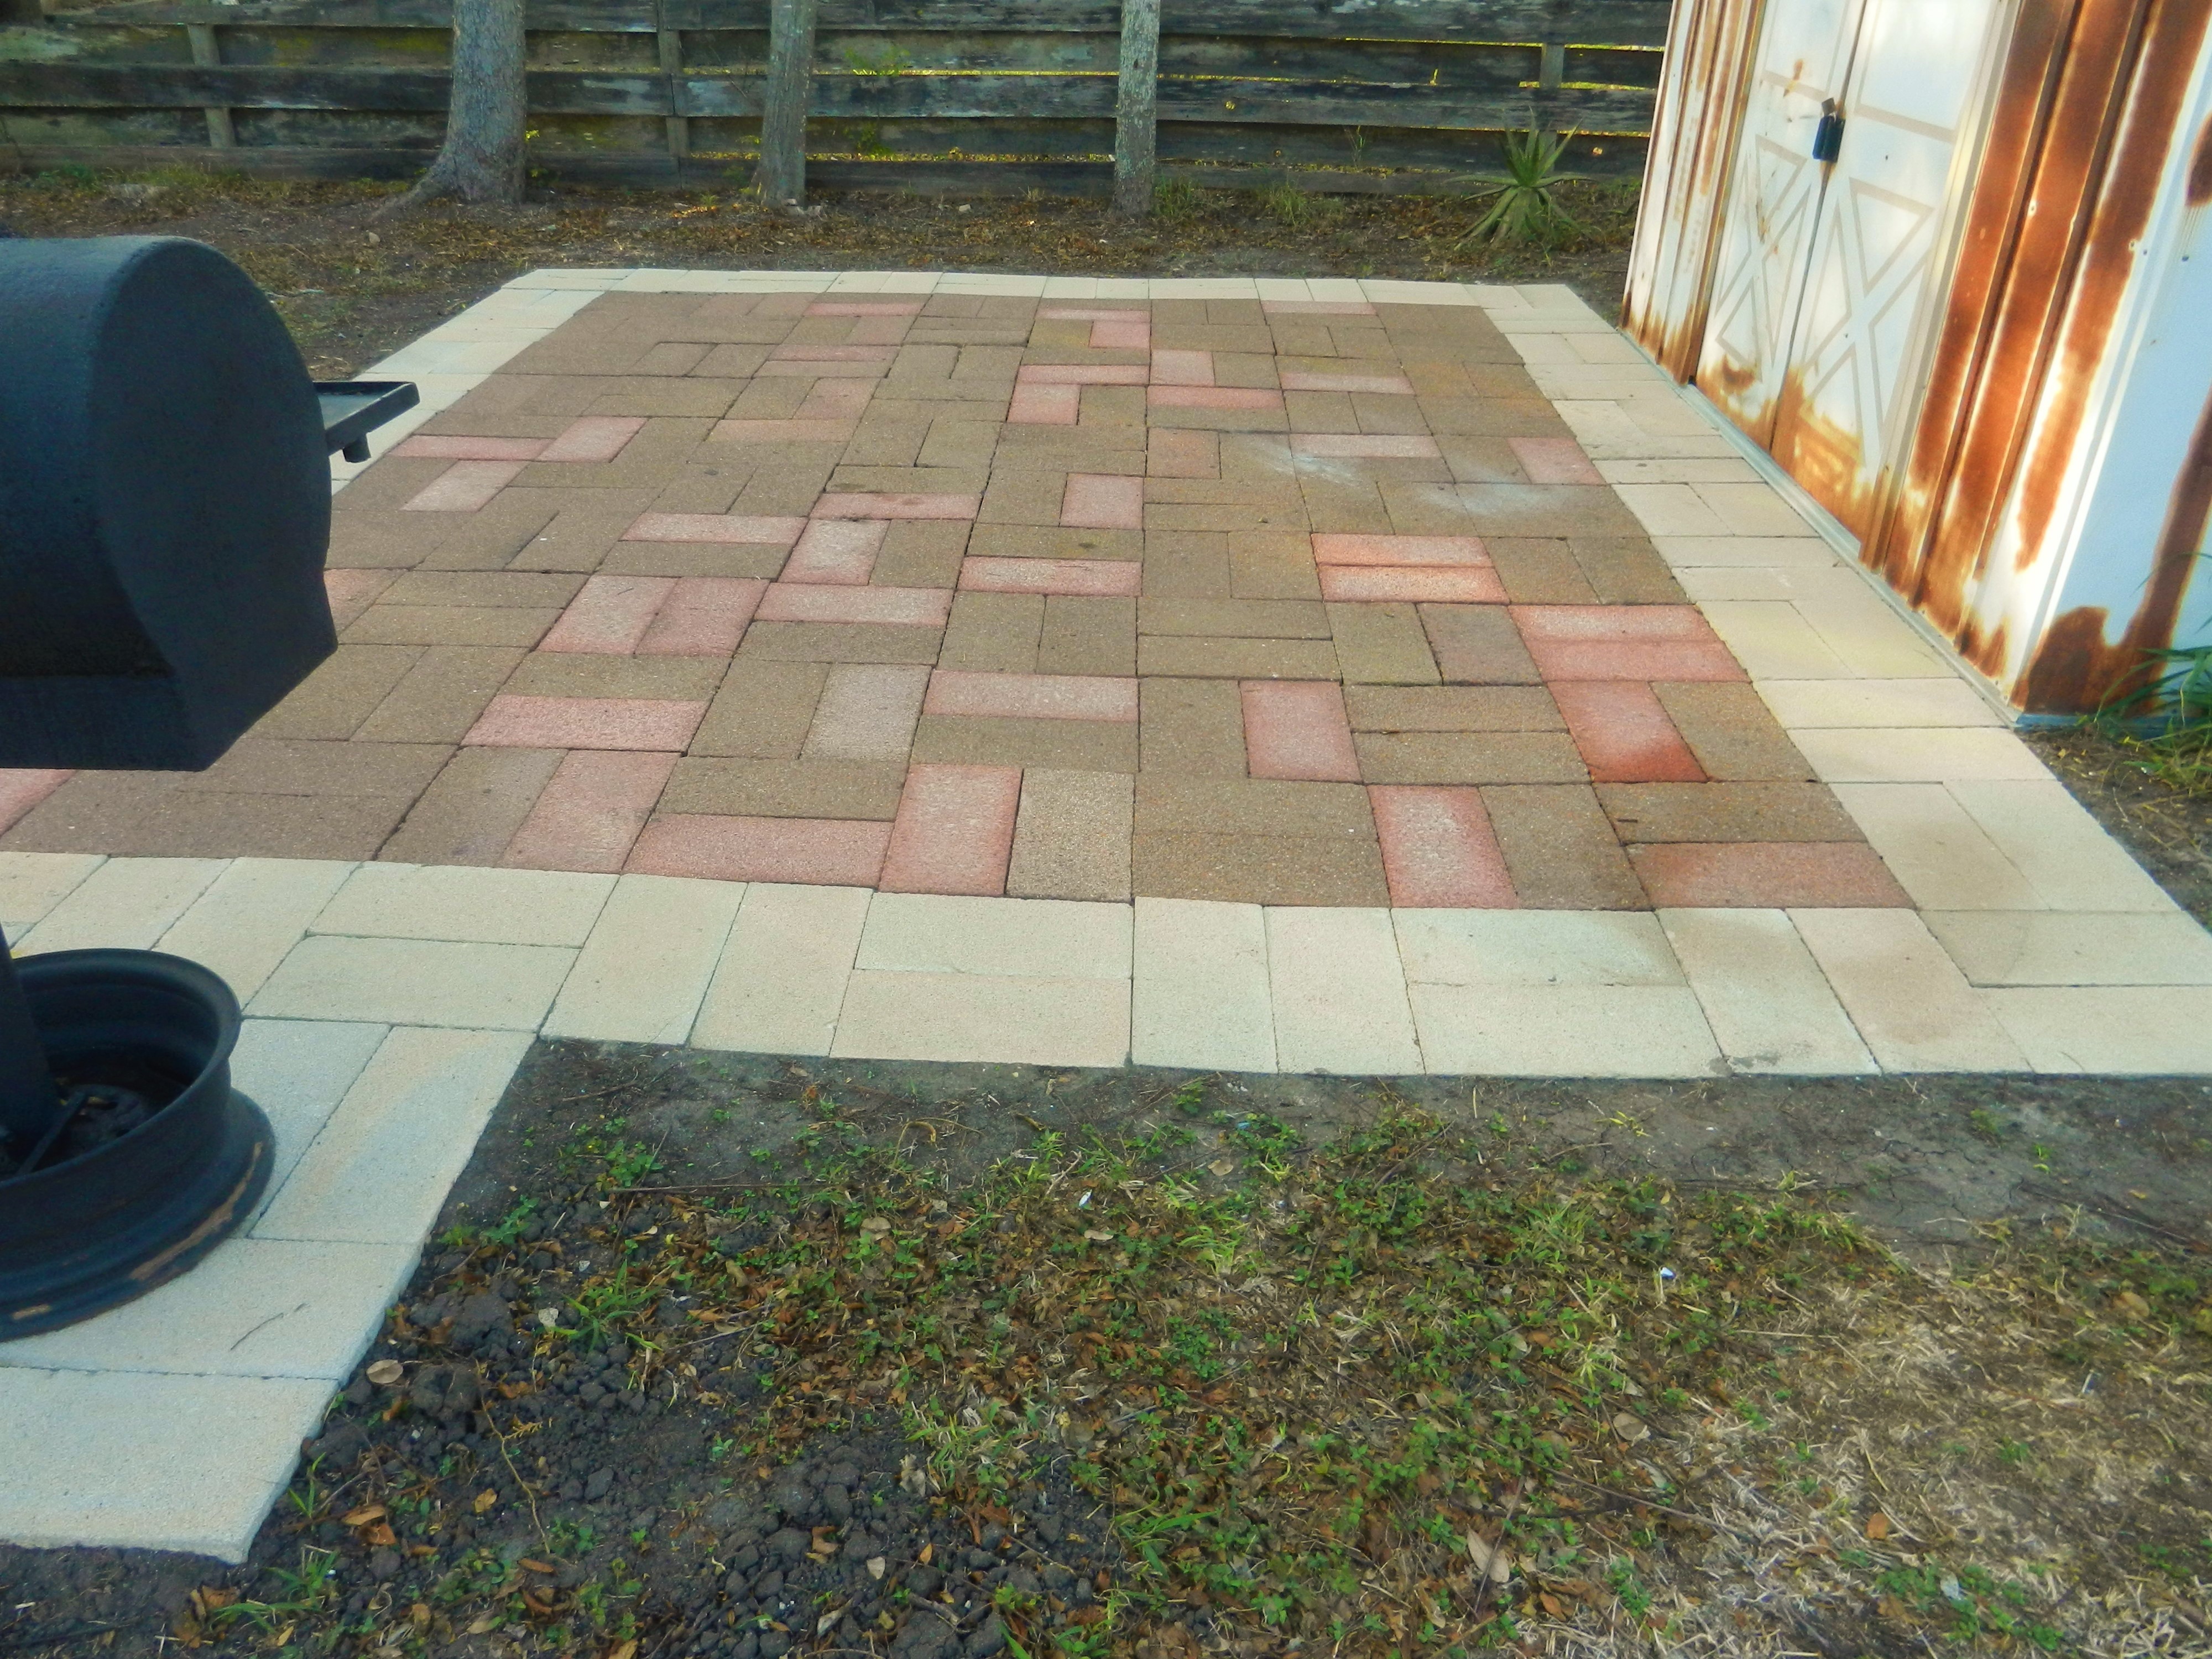
For those interested, this is the exact stone we used (and yes, I realize it is concrete block and not actually “stone pavers”. They are a fraction of the cost of stone, and they get the job done!).
And the surprise addition to the patio I mentioned in my previous post is *drum roll*…a fire pit! This is the one we purchased:
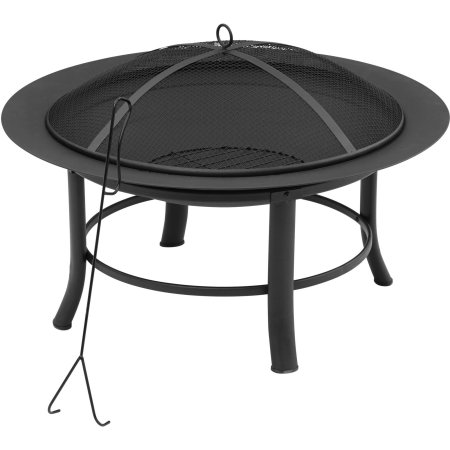
This was $30 from Walmart. It’s currently housed in the shed when we’re not using it, but it will eventually have a permanent stone surround in the center of the patio.
I am SO glad this thing is finally done! It was a ton of work, but definitely worth saving the money and doing it ourselves 🙂
We also had the deck built and had some carpentry work done in the front. I’ll be sharing those updates soon, but next week we’ll take a break from the outdoors and check out our dining room reveal! (I shared a sneak peek of the wall color on Facebook if you missed it.)
Until then,