How you hang your window treatments is just as important as what you choose to hang up. The right curtain placement can create the illusion of larger, taller windows and even make the room feel bigger while letting in more natural light. And if you're anything like me, you may have once found yourself frustrated and left with a bunch of screw holes after trying to get a curtain rod hung level and centered at just the right height. Today I'm sharing a favorite tip of mine for hanging curtains perfectly without the hassle!
 (This post contains affiliate links. For more info. you can check out my disclosure policy here!)
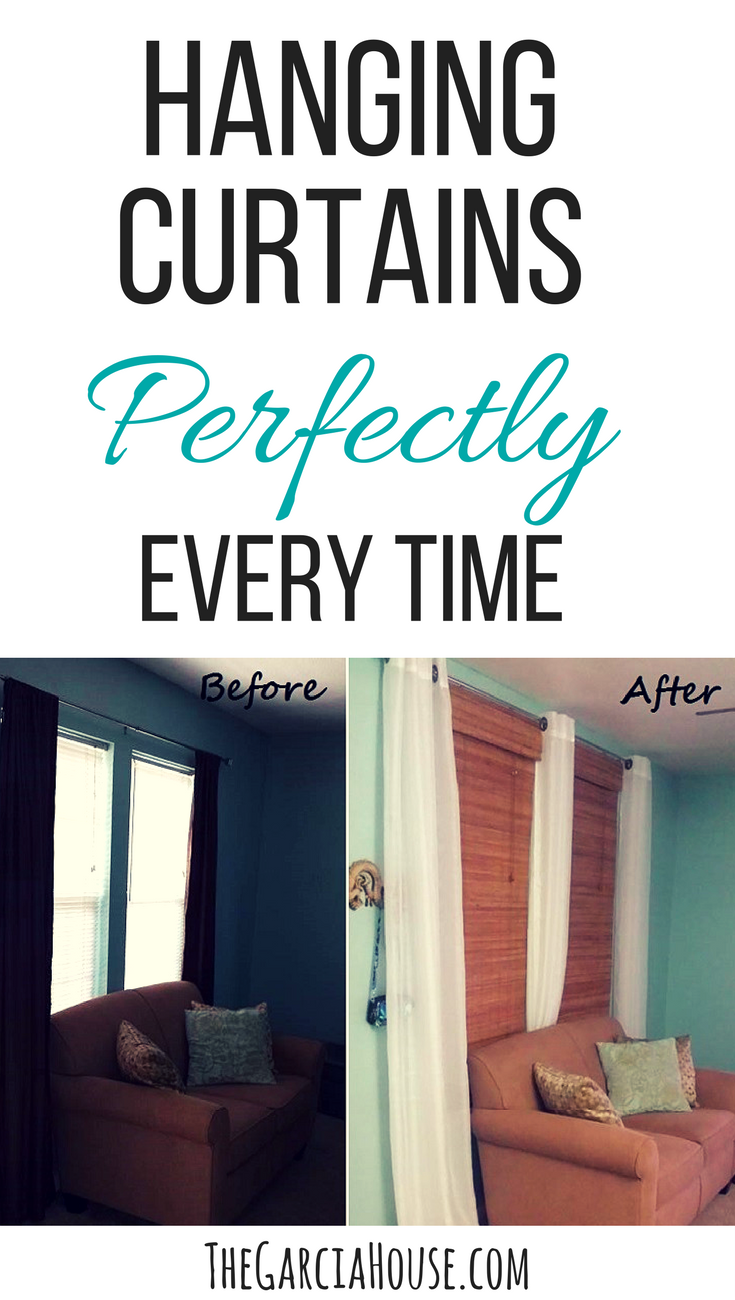
Below is a picture of the old curtain set-up in our living room:

(Adorable photo bomber alert)
Our little living room has two side-by-side windows facing out to the front yard. Having hurricane shutters limits the natural light coming in, so I definitely didn’t want to do anything inside to further block the windows. Like most people, we started off with plastic white mini blinds (complete with dust dating back to the crustaceous period) and bland, cheap curtains that were hung just above the top of the window.
 They're a lovely shade of poop-brown.
Not very exciting and it darkened the room. We’re currently on a mission to brighten up the place, so I decided this would be a two part fix: 1) replace the blinds and curtains and 2) change how they are hung to maximize window potential. I really wanted something light and airy for the curtains. Sheer panels fit the bill. For the blinds, I wanted to bring in a natural material with some texture, so I went for bamboo blinds. I love the way that combo looks in this space.
With that end goal in mind, I went shopping and found these 96” sheer panels with metal grommets for only $10.99 at Burlington Coat Factory.

Y’all. This is curtain jackpot. A package of two, mega-long panels with grommets for 10 bucks?! Yes, please. If your Burlington doesn't have any, these are nearly identical. For the blinds, we went to Lowes and picked some out that were around $19 each—a bit pricey for me, but considering they usually go for $40+ each, I think we did alright. (You could also buy these, which are exactly like ours.)
Before you go shopping for blinds, be sure to measure your window because there are multiple lengths and widths available. Keep in mind that Lowes will cut blinds in-store to fit your window if the exact size you need isn’t on the shelves. (Tip: If you’re considering doing this and want a darker blind, you can buy a lighter/ unfinished color and stain them at home yourself. The lighter ones are usually priced lower.)
After you pick your curtains, it's time to bust out the iron. Ironing your curtains before you hang them makes a huge difference. My husband gave me a hard time about this because I N-E-V-E-R iron my clothes, yet here I was ironing curtains. Who irons though, fo’ real? Isn’t this like a medieval practice?
 (Proof that my ironing skills are on point)
When hanging window treatments, you want to go “high and wide”. This creates the illusion of taller ceilings and bigger windows. We hung these panels about 95.5” high so that they “kiss” the floor. Too short and you get high-water pants effect; too long and you get a puddle of curtains.
We extended our rod as far as it would safely go while still being well supported in the center, which gave us about 10.5” on each side of the windows. In our case, we planned for the sheers to be stationary (as opposed to covering the windows). We hung a third panel to cover the little space between the two windows.
Here’s a trick to make hanging curtains SO much easier (and ensure the rod is level):
Use a piece of paper or cardboard as a stencil. Line up the bottom corner with the top corner of the window. Mark on the paper where you want your screw to be and poke the screw through to make a mark on the wall. Then flip the template and repeat on the other side. That’s it!
 (Star marks the spot for your screw)
Next, we hung the blinds. We mounted them the same height as the curtain rod. And here’s how it looks finished:

I love how it came out. We get so much more light in here. I was concerned we might need to put a liner on the blinds for privacy at night, but to our surprise, you can’t see in at all. They also block light during the day better than I expected.
One more before and after:

I'm so happy with it! What do y’all think? Are you inspired to switch up your window treatments/ curtains/ blinds/ sheets hung on the wall with thumb tacks? 😉 Let me know in the comments below!


")